The libraries allow saving of items within them as well as their subsequent editing or deletion.
Blocks, text, images, buttons, and social sets have a function that allows saving within their related library.
Each item can be placed in the library in two ways:
- By using the Save in the library button in the toolbar
- By selecting the Save in the library function on the menu that appears by right-clicking on that item.
|
|
| Click to enlarge |
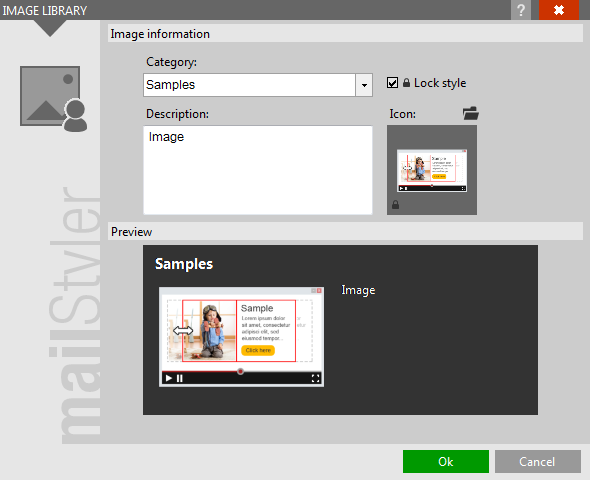
The library window pops up. Remember that each element will be saved within its specific library. For example, an image will be saved only within the image library.

|
| Click to enlarge |
The title of the window indicates in which library you're about to save the item.
Through the menu Category you can create a new category in which to save the item, or select an existing one. To create a new category, simply click inside the menu and enter the new name.
The option Block style is useful when you want to preserve the item saved from subsequent changes to the global style of the newsletter.
Inside the field Description you can enter a text that identifies the saved item.
Each item that is saved in the library is represented by an icon depicting a thumbnail of that element.
If you prefer to give the element a different icon from the one created by MailStyler, you can choose another image by clicking on the Icon to the right of the screen.
The Preview panel shows how the item will be represented in the library.
After clicking OK, the window closes and the saved item will be visible in the related library.
If you want to change the category, description or icon of an item that has already been saved, simply double click on the icon that represents it and change the information within the library window that pops up.
To delete an item from the library you will need to double click the icon that represents it, and click on the 'Remove' command, which is located in the lower right corner of the library window.
See also:
The Library panel


